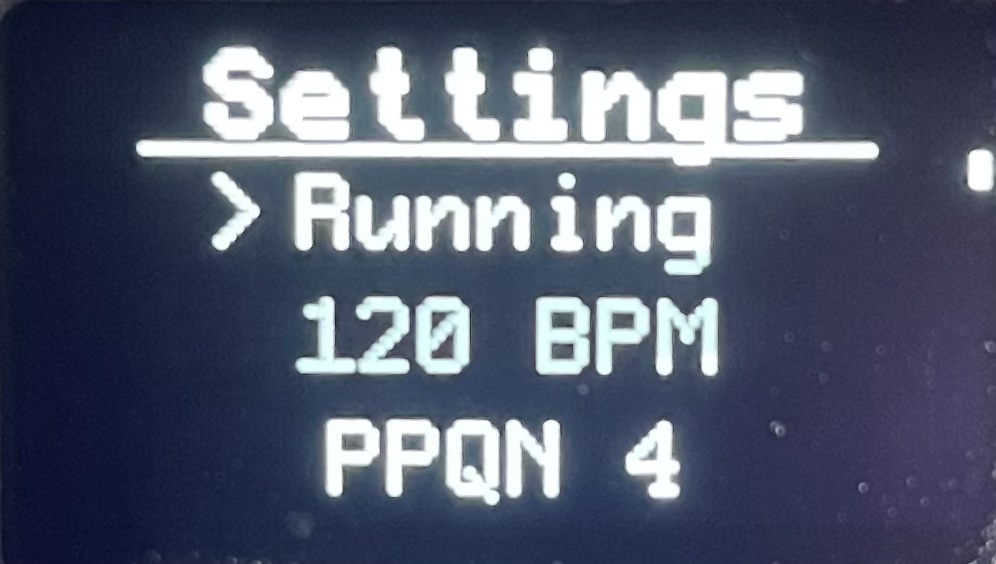
Global Menu
The Global Menu contains all settings related to the global operation of the device, e.g. settings that encompass all channels, such as the BPM or start or stopping the device. The global menu can be accessed from the Channel Screen by holding the SELECT button and pressing the ROTARY ENCODER.
 The Global Menu
 Controls
Controls for Global Menu are listed in the table below
| Buttons | Function |
|---|---|
| PRESS ENCODER | Select / toggle / confirm value |
| ROTATE ENCODER | Adjust selected value |
| PRESS SELECT | Escape or Back |
Settings
All settings for the Global Menu are listed in the table below
| Function | Description |
|---|---|
| Run | Starts and stops the device |
| BPM | Sets the BPM, when an external clock is connected this setting is ignored and will appear as E.BPM. |
| PPQN | Sets the clock resolution, or pulses per quarter note for external BPM synchronization |
| Run SRC | Configure the run source, either as Manual, CV inputs, Clock input or Expander inputs |
| Run Mode | Configure the run mode, either as TRG Trigger (rising edge) or GTE Gate. This setting has no effect if Run SRC is set to MAN Manual. |
| Reset Mode | Configure the run reset mode, either as RUN (Run), TRG (Trigger) or CON (Continue). When set as Run, a reset event will only occur when the device begins running. Once running any subsequent triggers from the Run SRC will not have any effect. When set as Trigger, the device will reset whenever there is a trigger from the Run SRC. When set to Continue the device will continue running from its halted position. |
| CLK Mode | Configures the Clock input to either BPM or GTE Gate Only. When configured for BPM, the device will be clocked from the input signal. When configured for Gate Only, the Clock input has no affect on the BPM and allows the input to be used for other purposes. |
| Input Focus | Configure the input focus mode. See below for more detail. |
| Recorder Links | Configure recorder links for all channels. |
| State Manager | Save, Recall and Modify states |
| Wipe Mods | Wipes all modulation settings from the device, restoring them to default |
| Wipe Channels | Wipes all channels from the device, restoring them to default |
| System | Opens the system sub menu |
Input Focus
Input Focus is a way of allowing the Input to only be active when it is focused by a given channel. This is useful when wanting to reuse a CV input for multiple channels. The Input Focus can be “scoped” or “limited” to different functionality:
| Scope | Description |
|---|---|
| GBL | Global focus. There is no Input Focus enabled, the input will affect all channels, modulations, Recorder triggers etc |
| CH | Channel only focus. Focus only applies to the input when using the IN waveform |
| CH + REC | Channel and recorder focus. Focus only applies to the input when using the IN waveform, OR using Recorder triggers |
| CH + MOD | Channel and modulation focus. Focus only applies to the input when using the IN waveform, OR using Recorder triggers OR modulation sources |
Example
- CV input 1 is connected to an external potentiometer or fader, with Input Focus set to
CH. - Output channels 1 and 2 are both configured to use the CV input waveform, and both have their morph setting set to CV input 1.
- When the user activates channel 1: then only channel 1 will register CV input 1 changes. Channel 2 will not register any change.
- When the user activates channel 2: then only channel 2 will register CV input 1 changes. Channel 1 will not register any change.
Recorder Links
See Recorder Links.
External Clock Synchronization
Juniper has a predictive (and not reactive) clock generation mechanism. This means that Juniper measures the external clock tempo from utilising two clock edges. As a result, Juniper doesn’t work entirely well with a swung external clock, especially if the phase of a channel is locked (e.g. not set to Free). Juniper will measure the BPM on rising edges, allowing for asymmetrical clock sources from certain sequencers (such as the OXI ONE).
Clock resolution
The PPQN setting describes how many pulses per quarter are used for determining the BPM from an external source. It can be thought of as the clocking “resolution”. Generally this setting should be set to a higher value to increase responsiveness of Juniper especially when starting Juniper using the clock input.
System submenu
The System submenu contains system information such as versioning, factory reset and reboot options. The System submenu also allows the user to execute a device firmware upgrade (DFU) of any expander connected via the SD Card. The following options are available:
| Function | Description |
|---|---|
| VER | Version of Juniper |
| BPM Accuracy | Configure for either integer or fractional (1/10th) BPM accuracy |
| LEDS | LED Brightness |
| OLED | OLED Display Brightness |
| S.Saver | Screen saver duration |
| CH. Tap | The channel tap window. The amount of time between pressing the SELECT button, and then pressing a channel button. Default is 700mS as indicated by the asterix |
| Reboot | Reboot device |
| Factory Reset | Reset device entirely with exception for calibration data |
| GIN | GIN Version |
| GIN Upgrade | Firmware upgrade available for GIN |